
Drywall Repair Denver
Drywall Repair Denver
Ever scratched or dented your drywall and thought it’s a disaster? Don’t worry! With the right products and techniques, you can easily fix minor damages yourself. Whether it’s small scratches or larger holes, we’ve got you covered. Read on for practical tips on choosing repair kits, ensuring safety, achieving smooth finishes, handling major damages, and when to consider professional help. Remember, a neat drywall repair is just a few steps away!
Key Takeaways
- Joint compound is essential for minor scratches or dents
- Different types of products may be needed depending on the extent of damage
- Quality materials upfront save time and money
- Professional help may be necessary for complex or extensive repairs
Choosing the Right Products
Choosing the right products for drywall repair, such as joint compound or pre-made repair kits, is crucial to achieve a smooth finish and durable result. Depending on the extent of the damage, you may need different types of products. For minor scratches or dents, a thin layer of joint compound will do the trick. You can apply this with a putty knife for an even spread.
Sometimes, you’ll face larger cracks that require more reinforcement. This is when reinforcing mesh comes in handy. It provides support to hold your repair material in place and ensures it doesn’t crumble over time.
Now if you’re not sure what to buy or how to mix your own mud, don’t worry! There are pre-made repair products available too. These kits often come with everything you need – reinforced panels, self-adhesive tape and even Patch Plus Primer by brands like 3M.
Remember, choosing quality materials upfront can save you time and money down the road. A successful drywall repair starts with picking out the right tools and supplies for the task at hand.
Next up we’ll discuss how essential safety measures and neatness are during this process without jumping into any unnecessary steps.
Safety and Neatness Tips
It’s crucial to take safety precautions and maintain neatness when tackling a wall restoration project. You don’t want your efforts marred by mishaps or shoddy workmanship.
| Safety Precautions | Neatness Tips | Essential Tools |
|---|---|---|
| Inspect for electrical cords or plumbing lines before cutting into drywall | Remove all frayed edges around the damaged area | Putty knife |
| Wear gloves and mask to protect yourself from dust and debris | Ensure smooth finish with no bumps or lumps | Fine-grit sandpaper |
| Use a flashlight to carefully inspect the repair area | Pay attention to detail, minor errors can be noticeable once paint is applied | Reinforcing mesh for larger cracks |
| Always cut slowly and carefully, hasty actions can lead to more damage or injury | Clean up debris immediately after working, it helps keep your workspace tidy and safe | Self-adhesive tape for small repairs |
| Keep children and pets away from the workspace until the project is complete and cleaned up | Apply products neatly, ensure they are spread evenly on surface without spillage | Repair kits like the handy ‘3M Patch Plus Primer’ |
Remember that patience is key in any DIY project. Every stroke of your putty knife adds character to your wall. Make it count! Now you’re ready for what’s next – perfecting your application technique and mastering the art of sanding.
Application and Sanding Techniques
Now that you’re familiar with safety and neatness guidelines, let’s delve into the nitty-gritty of applying joint compound and mastering the sanding process. The key to a seamless drywall repair is all in the application of your joint compound. It should be applied thinly; think of it as buttering toast, not frosting a cake! Hold your putty knife at a 70-degree angle for best results. And remember, you don’t have to be perfect on your first try—just smooth it out as much as you can.
After applying the mud, let it dry completely before moving on to sanding. This part might feel tedious but trust me, patience pays off here. Use fine-grit sandpaper to gently smooth over the repaired area until it blends seamlessly with the rest of your wall. Don’t stress if there are still visible imperfections after this step—you’ll likely need a second layer of joint compound followed by more sanding.
Mastering these techniques will make small drywall repairs feel like a breeze! Next up: tackling those larger damages without breaking a sweat or busting your budget.
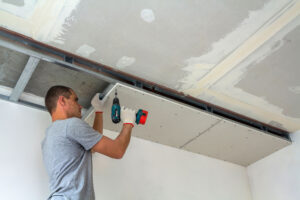
Managing Larger Damages
Dealing with bigger wall damages can seem intimidating, but don’t worry, you’ve got this under control. You’ll need to use a drywall patch for larger holes because spackle alone will just crumble. You can easily find these patches in stores or online, and many come in kits that include all the tools you need.
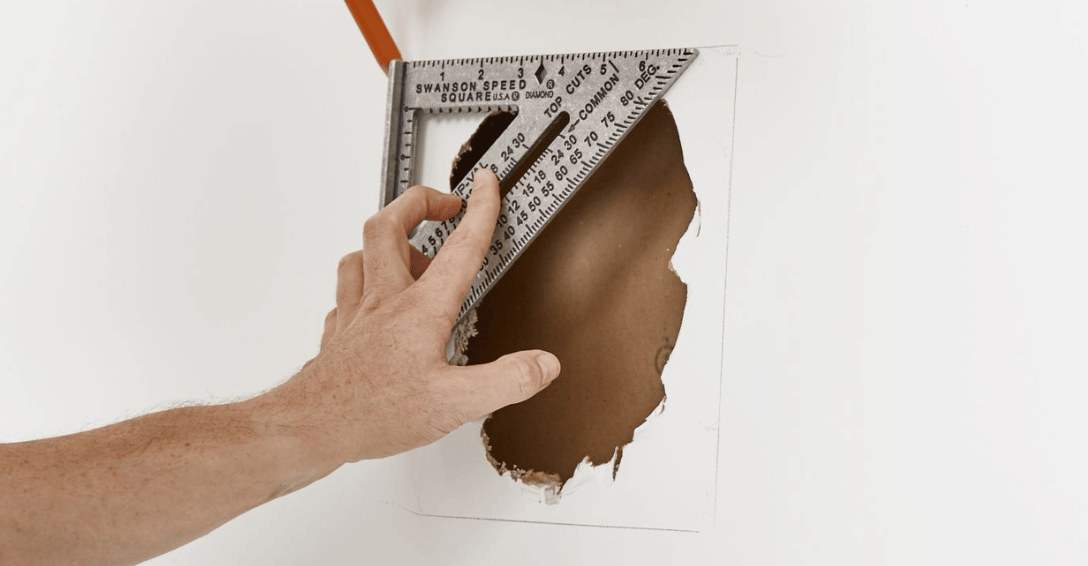
Start by cutting out the damaged area. Be careful not to cut any deeper than necessary as there may be electrical cords or plumbing lines hidden behind the wall. Use your flashlight to inspect before making any cuts. Once you’ve removed the damage, apply a mesh patch over the hole.
Next comes the tricky part: applying joint compound over your patch. Remember that thin coat we talked about earlier? Now’s when it really matters! Apply it carefully using a putty knife held at a 70-degree angle; feathering the mud around edges of your patch for smooth integration with existing wall is key here.
After drying time (check product instructions), sand down your repair job until it’s nice and smooth. If needed, apply another layer of compound and repeat the sanding process. It may take some patience but remember – neatness counts!
Before you know it, you’ll be considering whether tackling such jobs yourself is more cost-effective than hiring pros!
Professional Repair Considerations
Before you dive into the next DIY project, consider the advantages and potential costs of professional help. Sometimes, despite your best efforts, a drywall repair job might be beyond your reach. That’s okay! There’s no shame in calling in the pros. They’ve got years of experience under their belt and can often get the job done faster and more efficiently.
Let’s talk cost; it can be a significant factor when weighing DIY versus professional repair. The affordability of repair kits might sway you towards doing it yourself but remember to account for time spent learning new skills or potentially redoing work that didn’t go as planned.
What about those tricky repairs like larger holes or damaged corner joints? These require a deft hand to ensure a smooth finish that blends seamlessly with the rest of your wall. A pro has mastered this art through countless similar jobs.
Don’t dismiss professional drywall repair services outright because they cost more upfront. When you factor in time saved, stress avoided, and quality results achieved, sometimes calling in an expert is worth every penny. And who knows? You might even pick up some tips for your future DIY projects while watching them work!
Frequently Asked Questions
What are some common mistakes to avoid when doing drywall repair on your own?”
Avoid common drywall repair mistakes like rushing the process, not using enough joint compound, forgetting to sand between coats, or neglecting safety precautions. Remember, it’s about precision and patience, not speed.
How can you prevent drywall damage from recurring, especially in high-traffic areas of the home?”
To prevent recurring damage, especially in high-traffic areas, use durable materials like corner protectors. Regularly check for popped nail heads or cracks and repair them swiftly. A fresh coat of paint can also add protection.
Are there any specific tools or equipment that can make the drywall repair process easier and more efficient?”
Absolutely! A putty knife, joint compound, sandpaper, and a mesh patch make the job easier. Also consider using a drywall repair kit. It includes all necessary tools, making your work more efficient.
What are the signs that indicate a drywall repair job is beyond DIY and requires a professional’s help?”
When you see extensive water damage, mold growth, or large holes in your drywall, it’s time to call a pro. Also, if the job involves electrical wires or plumbing lines, don’t risk DIY. Safety first!
How can you properly dispose of old or damaged drywall removed during the repair process?”
You can dispose of old drywall by breaking it into smaller pieces and putting it in heavy-duty trash bags. Check with your local waste facility to see if they accept construction debris or consider renting a dumpster.